Remove Molding From Kitchen Cabinet Doors - Update kitchen cabinets without replacing them by adding trim : Remove mold & mildew from furniture diy hack *stop the stink mold, mildew, musty, moth balls hack.
Remove Molding From Kitchen Cabinet Doors - Update kitchen cabinets without replacing them by adding trim : Remove mold & mildew from furniture diy hack *stop the stink mold, mildew, musty, moth balls hack.. Begin prying from either end of the trim, slipping the edge of the pry bar under the trim and prying against the wood wedge or block. So then don't add it to the ceiling. Work from end to end, don't start in the center. And taking the scroll detail off over the sink is also a good idea. Remove glue residue from the rear of the molding or the subsurface by brushing the surface with a layer of adhesive solvent.
Remove glue residue from the rear of the molding or the subsurface by brushing the surface with a layer of adhesive solvent. Painting the cabinets is also a good move and invest in some more modern handles, maybe go to the chrome. It features and extra wide, shallow, recessed panel and a charming rope edging detail. Remove the doors and hinges. How to strip your plastic vinyl covered kitchen cupboard doors ready for painting.
How to Add Antique Leaded Glass to Cabinet Doors | how-tos | DIY from diy.sndimg.com Using a screwdriver, take out the screws holding the doors to the hinges (image 2), being careful to hold the door tightly so when it releases it doesn't fall or bang into the cabinets. Remove mold & mildew from furniture diy hack *stop the stink mold, mildew, musty, moth balls hack. This cabinet door front looks great in glass and french lite styles and has a matching 5 piece drawer front. Cut it off with a jigsaw. Bleach and specific mold removers can be used.remove mold from wood cabinets so how to get rid of mold using these products? Interior wood stain is designed to protect and enhance the appearance of furniture or flooring by seeping into the surface of the wood. Insert the blade in between the trim and cabinet. Once you have clearance for the prybar, place the putty knife under the fulcrum point to protect the cabinets from damage.
Adding crown molding to your kitchen cabinets weekend craft from www.weekendcraft.com taking off the doors and drawers, removing countertops, and detaching trim molding.
Toe kick molding covers the toe space of the cabinets to cover the exposed wood and allows your feet to stand closer to your workspace. Use a putty knife and a small prybar to pry the molding loose. Painting the cabinets is also a good move and invest in some more modern handles, maybe go to the chrome. Insert the flexible putty knife between the molding and the cabinet and try to gently pry the molding away. We believe the second option is the optimum option. The same method will work to remove the toe kick. Begin prying from either end of the trim, slipping the edge of the pry bar under the trim and prying against the wood wedge or block. Carefully pull the pry bar toward you to pop off the base molding. How to remove decorative cabinet scrollwork 01.17.2018 you guys have been asking for this tutorial for ages (a whole year, to be exact), so i finally put my head down the last couple of weeks to get the project wrapped up and photographed, and now i'm finally ready to share the diy details. How to strip your plastic vinyl covered kitchen cupboard doors ready for painting. Change the look of the door fronts entirely by adding beadboard inside the space framed by the molding. Paint the feet to match the cabinetry for the. This is both important for functionality and having a clean design.
Use mineral spirits with steel wool to clean the wood, according to family handyman. Or you can take the kitchen door to a free space. I think it should just come off. Therefore, i would rather go for a more minimal approach and replace the cabinet doors with some plain ones. Cut the beadboard to fit inside the molding frame on each door face, adhering it in place.
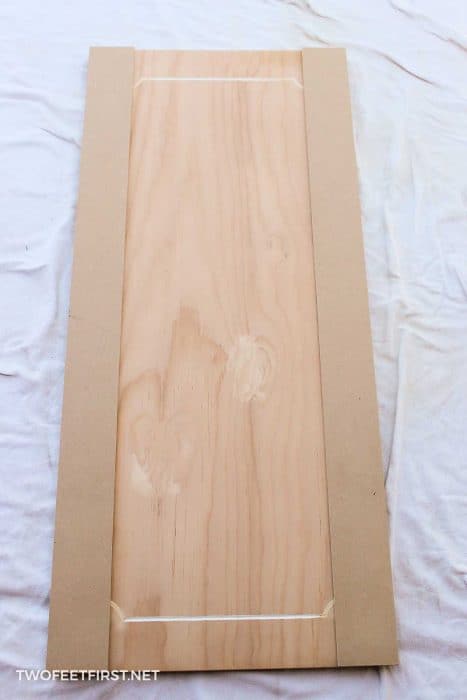
Update kitchen cabinets without replacing them by adding trim from www.twofeetfirst.net I would also remove the cabinet doors over the fridge altogether to create some open shelving like the shelving over the microwaves. Spray all over where the mold is and use a brush rather than a cloth to clean the mold. It helps to break up the older layers of grime. It almost looks like it was nailed on from the front, in which case i would just take a hammer and lightly, but firmly tap the molding piece on the back side. You can either remove everything around the kitchen door. Find a starting place near the end of a piece of molding. This cabinet door front looks great in glass and french lite styles and has a matching 5 piece drawer front. We believe the second option is the optimum option.
Remove glue residue from the rear of the molding or the subsurface by brushing the surface with a layer of adhesive solvent.
It almost looks like it was nailed on from the front, in which case i would just take a hammer and lightly, but firmly tap the molding piece on the back side. Therefore, i would rather go for a more minimal approach and replace the cabinet doors with some plain ones. It easily pulled away from the cabinet so with a little more force the pieces ripped right off. This is both important for functionality and having a clean design. Spray all over where the mold is and use a brush rather than a cloth to clean the mold. Fill up a bottle with a specific mold remover and cleaner. Here's the trim when it's completely detached. How to make old vinyl plastic covered kitchen cupboards ( cupboard doors ). Woodhaven cabinet doors offer a quality country design. Adding crown molding to your kitchen cabinets weekend craft from www.weekendcraft.com taking off the doors and drawers, removing countertops, and detaching trim molding. Use a putty knife and a small prybar to pry the molding loose. The same method will work to remove the toe kick. So then don't add it to the ceiling.
I think it should just come off. Allow the solvent to dissolve the glue, then scrape the glue away using the putty knife's edge. Carefully pull the pry bar toward you to pop off the base molding. Use either a crowbar or the claw of a hammer to remove these. So, take that driver of yours and loosen up those door hinges.
Update kitchen cabinets without replacing them by adding trim from www.twofeetfirst.net How to remove decorative cabinet scrollwork 01.17.2018 you guys have been asking for this tutorial for ages (a whole year, to be exact), so i finally put my head down the last couple of weeks to get the project wrapped up and photographed, and now i'm finally ready to share the diy details. You can either use the same wood as the rest of your cabinets or use a color or material that pops against the rest. And taking the scroll detail off over the sink is also a good idea. Once you have clearance for the prybar, place the putty knife under the fulcrum point to protect the cabinets from damage. I think it should just come off. Rinse the remaining glue residue from the surface with a sponge dampened with clean water. Pull the finish nails through the molding from the back to remove them. This cabinet door front looks great in glass and french lite styles and has a matching 5 piece drawer front.
I simply wedged a flat head screwdriver between the trim and cabinet.
And taking the scroll detail off over the sink is also a good idea. How to make old vinyl plastic covered kitchen cupboards ( cupboard doors ). Pull the finish nails through the molding from the back to remove them. This is both important for functionality and having a clean design. This cabinet door front looks great in glass and french lite styles and has a matching 5 piece drawer front. You can either use the same wood as the rest of your cabinets or use a color or material that pops against the rest. After cutting my hand (related to the video) and an insanely busy work life, here you go! Remove mold & mildew from furniture diy hack *stop the stink mold, mildew, musty, moth balls hack. Cut the beadboard to fit inside the molding frame on each door face, adhering it in place. Fill up a bottle with a specific mold remover and cleaner. So, take that driver of yours and loosen up those door hinges. So then don't add it to the ceiling. Insert the blade in between the trim and cabinet.